
Connecting a Softener to Copper, PEX, CPVC and Push-Fit
To connect a water softener to PEX or copper, or to CPVC and push-fit, make every material transition and every heat or solvent joint before the softener's plastic valve is attached. Then connect to the valve with its own adapters, supporting the pipe on both sides. Each material fails in its own way: heat for copper, lack of support for PEX, solvent for CPVC, seating for push-fit.
Most installs involve at least one transition, because the softener's adapters rarely match the house pipe exactly. So this page starts with the fitting at the valve, then covers the transition, then each material.
Start at the Softener: What the Valve Accepts
The softener valve or its bypass is the fixed point. Depending on the model, it takes one of these:
- Male or female pipe thread adapters, usually 3/4 or 1 inch.
- Sweat (solder) adapters in copper, which thread or clip onto the bypass.
- The valve maker's own installation fittings. Clack uses a nut, split ring and O-ring that are hand-tightened onto the valve. They come in copper, PVC and other versions.
- Clip-on ports, as on many retail softeners, where the bypass pushes into the valve and is held by clips.
Morton's installation manual lists acceptable supply pipe as copper, threaded pipe, PEX, CPVC and "other pipe approved for use with potable water". It gives two warnings that apply whichever you choose. Keep fittings "pipes squared and straight". And support all plumbing to avoid stress on the valve's inlet and outlet, because "undue stress from misaligned or unsupported plumbing may cause damage to the valve."
Three rules apply at the valve for every material:
- PTFE tape on threads, no pipe dope. Clack says this directly for inlet, outlet and drain threads. O-ring seals need no tape.
- Hand-tighten plastic nuts. Clack says not to use a pipe wrench on nuts or caps.
- The valve does not carry the pipe. Clack says its fittings accept roughly 2 degrees of misalignment and are "not designed to support the weight of a system or the plumbing."
Connect a Water Softener to PEX or Copper: Where the Transition Goes
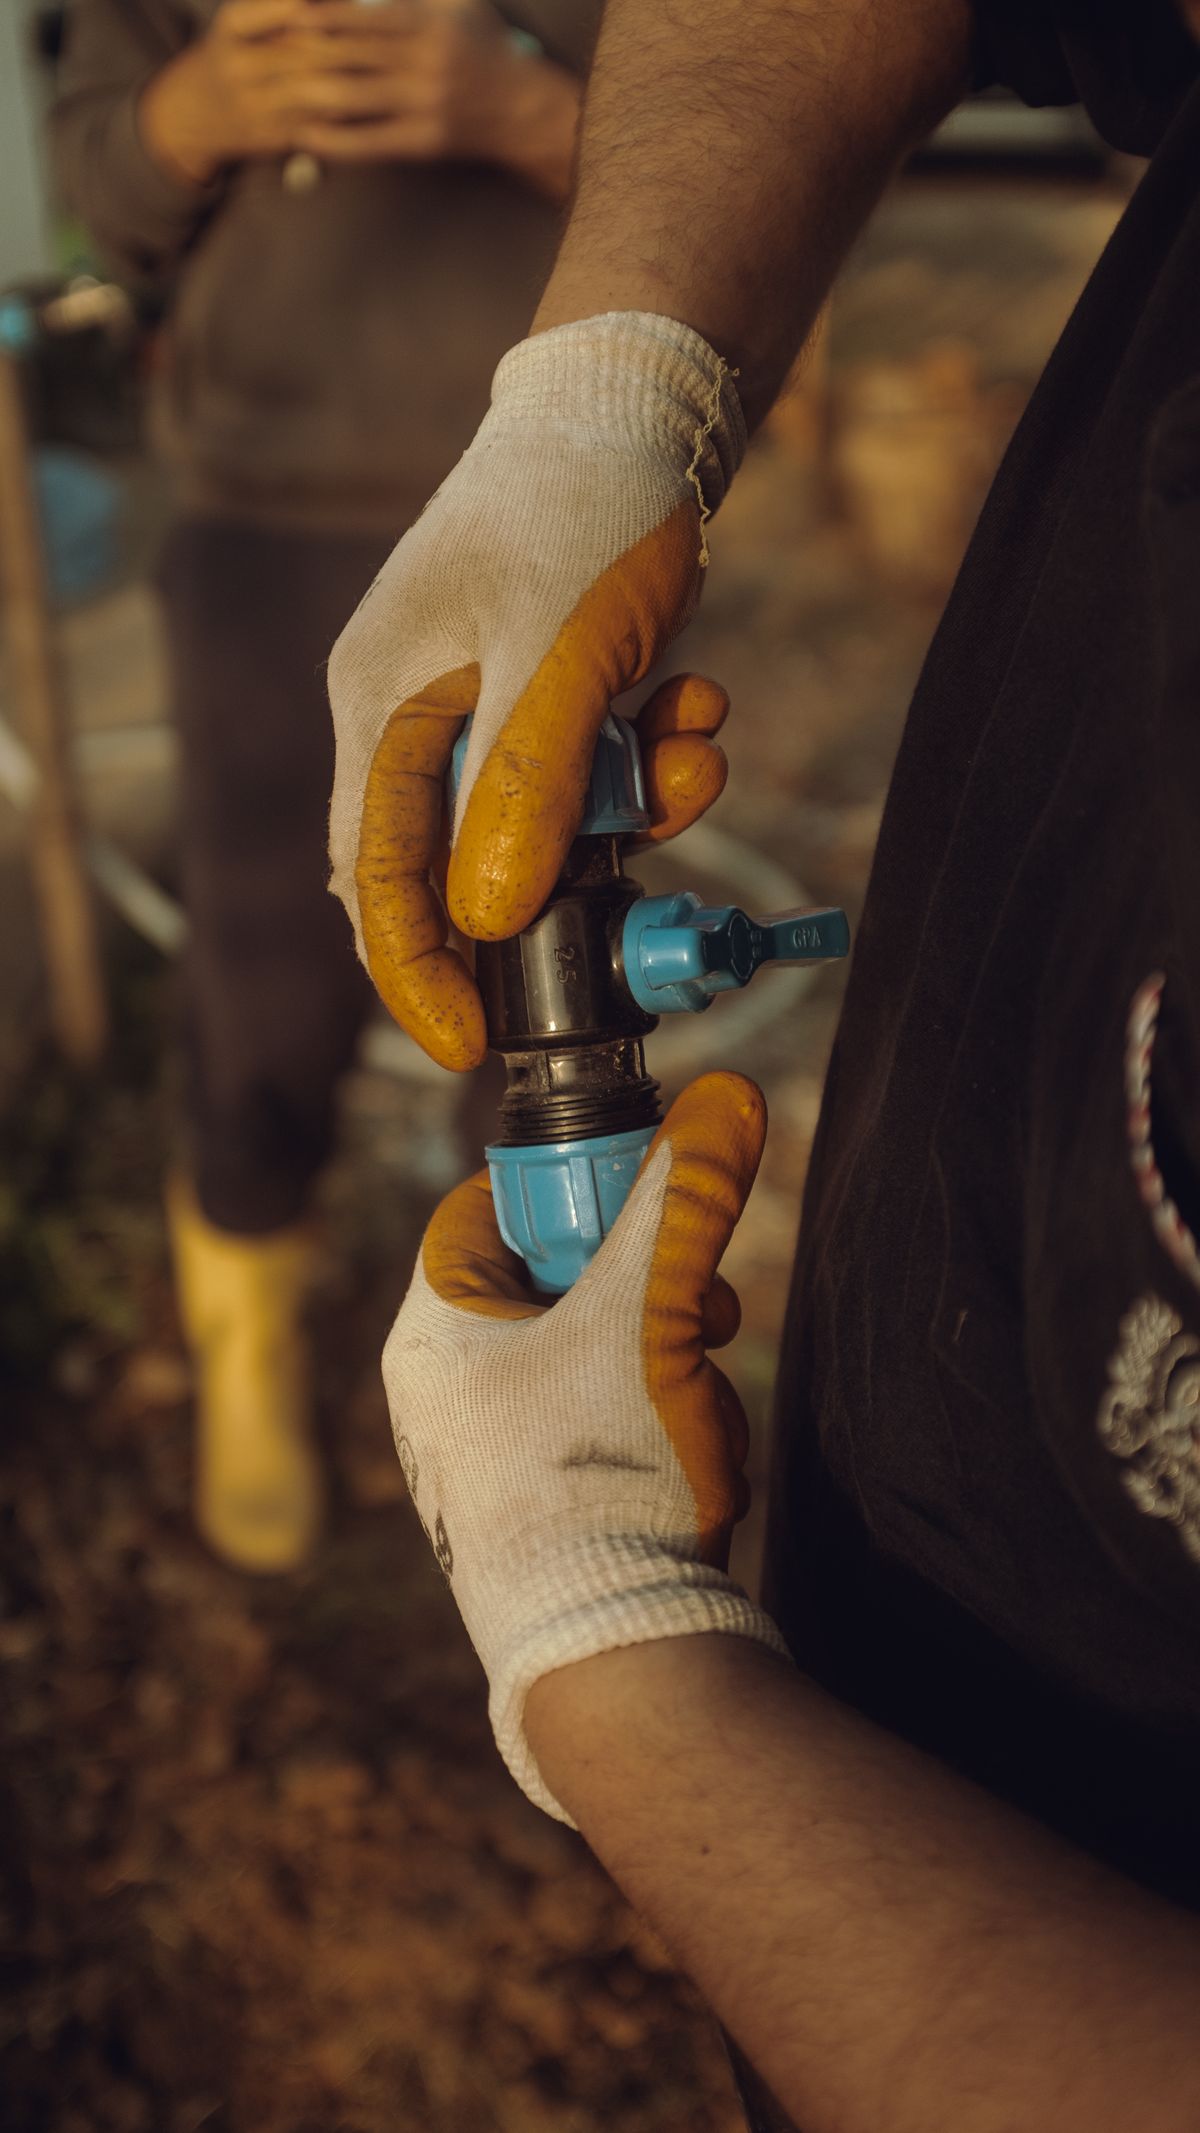
Make the change of material a short distance from the softener, on supported pipe. Then run the material that suits the valve adapter for the last stretch. That puts the joint that needs heat, cement or crimping where you can make it properly, not inches from a plastic valve.
| House pipe | To the softener adapter | Transition that works | What to watch |
|---|---|---|---|
| Copper | Sweat or threaded adapter | Solder the adapter to the copper off the valve | Heat reaching the valve, O-rings and drain flow control |
| PEX | PEX-to-thread adapter or maker's PEX fitting | Brass or approved polymer PEX adapter | Support close to the valve; no plastic male threads into metal |
| CPVC | CPVC socket or approved CPVC-to-thread transition | Transition fitting approved for CPVC | Cement cure time; primer and cement kept off O-rings |
| Galvanized steel | Copper or PEX for the last run | Dielectric union or approved brass transition | Old threads snapping; ground continuity |
| Any, in a tight space | Push-fit adapter | Push-fit coupling rated for both materials | Square cut, deburr, full insertion depth |
HUD's Residential PEX Water Supply Plumbing Systems design guide sets out the transition rules clearly. Solder copper transition fittings "and allow cooling before connecting to PEX tubing," because heat above 180°F can damage PEX. "Do not use plastic male threads or non-gasketed female threads when making a connection to metal threads." And for CPVC, "use only approved transition fittings."
The Dielectric Union Question
A dielectric fitting is needed where two different metals meet in a water line. At a softener, that nearly always means copper meeting old galvanized steel. The union holds the two halves apart with an insulating washer and sleeve, so the joint does not corrode the way copper screwed straight into steel does.
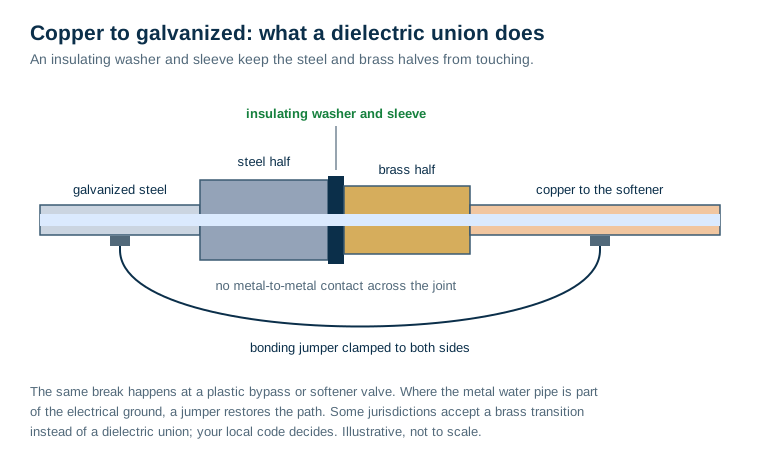
You do not need one between copper and the softener itself. The plastic valve and bypass already separate the metals. Some jurisdictions accept a brass nipple or brass fitting as the copper-to-steel transition instead of a dielectric union. Your local code decides. If the house is galvanized, deal with the condition of that pipe before connecting anything to it. The assessment is in installing a softener in an older home with galvanized pipe.
Copper: Keep the Heat Off the Plastic
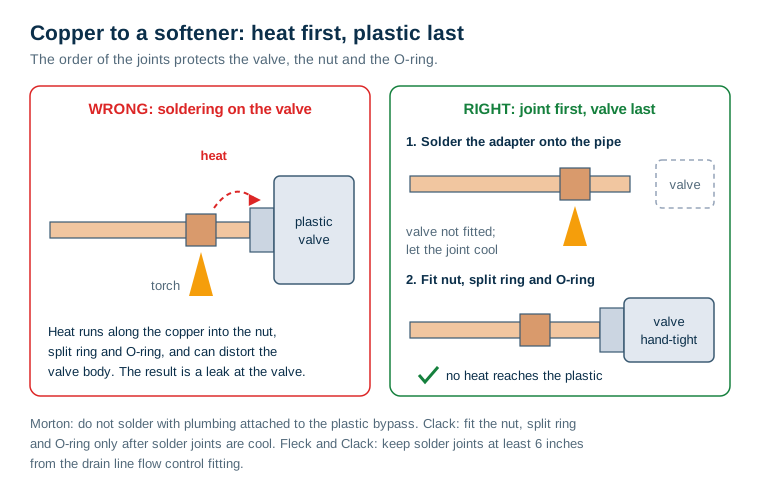
The failure mode: overheated fittings near the valve. Copper is the most rigid and best-supported connection, and the only one that needs a flame. The heat travels along the pipe. A joint soldered a few inches from a plastic bypass can soften the valve body or ruin its O-ring, and the leak may not show until the system is pressurized.
The manufacturers agree on what to do:
- Morton: "Do not solder with plumbing attached to the single bypass valve. Soldering heat will damage the plastic valve."
- Clack's WS1 service manual: connect the installation fitting to the plumbing system first, then fit the nut, split ring and O-ring once "solder joints [are] cool."
- Fleck and Clack: at least 6 inches between solder joints and the drain line flow control fitting, and solder near the drain port before that fitting goes on.
Method:
- Dry-fit the whole run with the valve in place to get lengths and alignment right.
- Take the valve end apart. Solder the adapters and any elbows on the bench or on the pipe, well away from anything plastic.
- Flush flux off the joints. Let them cool completely.
- Assemble onto the valve by hand. Support the copper with a strap on each side, close to the softener.
If a joint has to be made close to the valve in place, wrap the valve side with a wet rag and use a heat shield. It is better to add a short extra nipple and move the joint than to trust the rag.
PEX: Support It and Keep It Straight
The failure mode: unsupported PEX that loads the fittings. PEX is flexible, and it expands and moves as it heats and cools. Left hanging from a softener adapter, it puts a constant side load on the valve connection. In tight bends it can also kink or pull on crimp rings.
Method:
- Use an adapter that suits the valve: a brass PEX-to-male-thread adapter, or the valve maker's PEX fitting. Do not thread a plastic male adapter into a metal female thread.
- Make the connection with the tool your PEX type uses (crimp, clamp or expansion). Check each ring with the go/no-go gauge if it is crimped.
- Support it. HUD's guide quotes the model residential code's maximum horizontal support spacing for PEX as 32 inches. At a softener, add a support close to each side of the valve as well, so the adapter carries no weight.
- Mind the water heater. The same guide quotes a model code rule that PEX not be installed within the first 18 inches of piping connected to a water heater. That matters where the softener outlet runs straight to the heater.
- Keep it out of daylight. HUD's guide says PEX exposed to sunlight, including indirect light in an unfinished basement, should be covered with a UV-blocking sleeve or approved insulation.
Support spacing and water heater distances vary by code edition, so confirm the figures with your jurisdiction.
CPVC: Let the Cement Cure and Keep It Off the Valve
The failure mode: solvent damage and stress on the plastic. CPVC is joined with primer and solvent cement. Three things go wrong at a softener. The joint is pressurized before the cement has cured. Primer or cement drips onto the valve's O-rings. Or a rigid CPVC run is forced into line with the valve, leaving the joints permanently stressed.
Method:
- Cement all joints before connecting to the valve, and follow the cement maker's cure time for your pipe size and temperature before pressurizing.
- Keep primer and cement off the valve. Clack says to avoid getting them "on any part of the o-rings, split rings, bypass valve or control valve," and to fit its nut, split ring and O-ring only once solvent cements have set.
- Use an approved CPVC transition fitting to go to thread. Do not overtighten threaded plastic.
- Use only thread sealants the CPVC maker lists as compatible. Some sealants and excess cement can attack CPVC. At the valve, PTFE tape is what Clack and Fleck specify anyway.
- Cut the run to fit, so it drops into place without being bent or pushed.
Push-Fit: Mark the Depth, Then Check It
The failure mode: a fitting that is not fully seated. Push-fit fittings are fast and need no heat, which makes them popular for softener connections in tight spaces. They fail when the pipe end is not square, has a burr that cuts the O-ring, or is not pushed in to the full insertion depth. A partly inserted pipe can hold for hours or days and then blow off under a pressure surge.
Method:
- Cut the pipe square with a tubing cutter, not a saw.
- Deburr inside and out.
- Use a depth gauge or the maker's chart to mark the insertion depth on the pipe.
- Push in with a slight twist until the mark reaches the fitting face.
- Support the pipe so the push-fit fitting does not carry the weight or get twisted when you move the bypass handle.
- Check every mark again after the system is pressurized.
For PEX in push-fit fittings, the maker may require an insert stiffener. Check the instructions.
Flexible Connectors: The Useful Shortcut
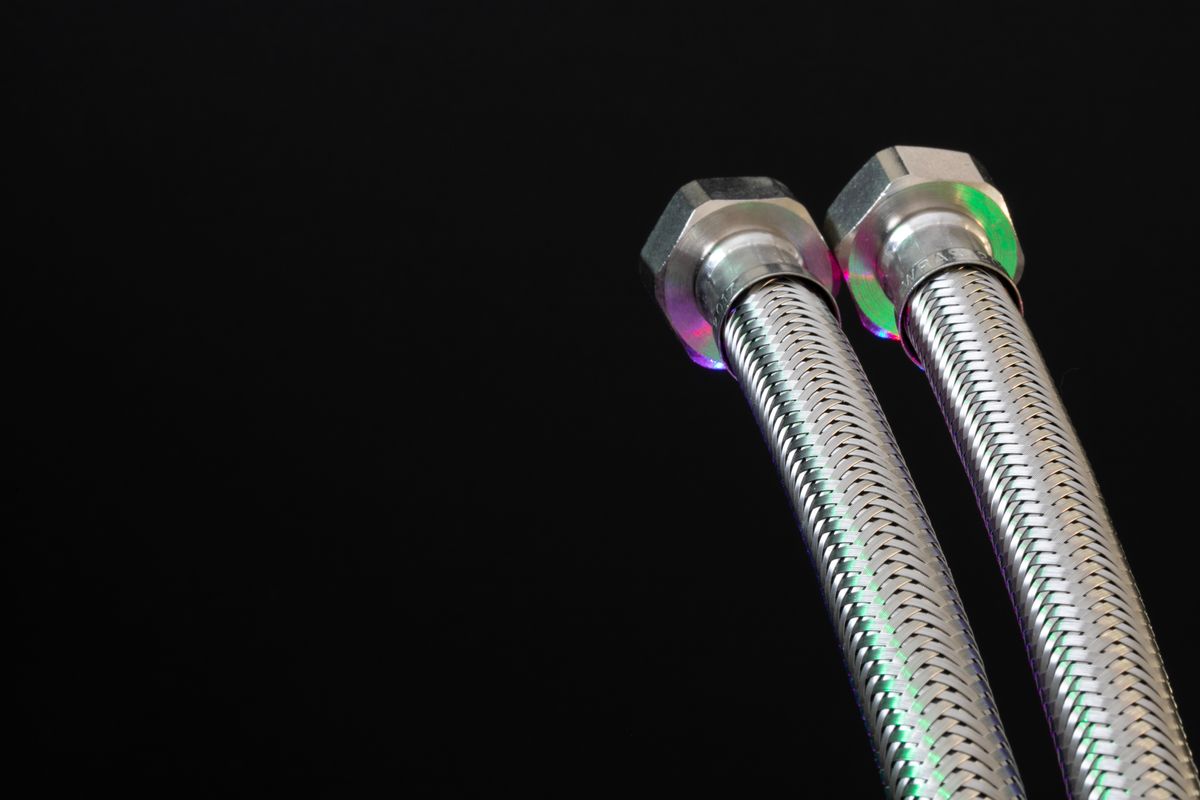
Braided stainless connectors between rigid pipe and the bypass are common and practical. They absorb small misalignments and let you slide the softener out for service. Use connectors rated for potable water, keep them short, and size them to the line. Their internal bore is usually narrower than the pipe, so they add a little pressure drop.
Keep the Ground Path
A plastic bypass, a dielectric union or a length of PEX all break electrical continuity in a metal water line. Where that metal pipe is part of the building's electrical grounding, Morton calls for a #4 copper wire "across the removed section of main water pipe, securely clamping it at both ends," and Clack says to "install grounding strap on metal pipes." The code questions are covered in how a softener affects plumbing bonding and grounding.
Which Connection Fits Your House
- All copper, room to work: sweat adapters soldered off the valve, straps on both sides.
- All PEX: brass PEX adapters, supports close to the valve, sleeve if exposed to light.
- CPVC: CPVC transitions, full cure before water, nothing on the O-rings.
- Mixed or cramped: push-fit or flexible connectors, with depth marks and support.
- Galvanized: transition to copper or PEX at a sound section of pipe, with a dielectric union or brass transition and a bonding jumper.
Good connections do not fix everything. They cannot correct a reversed inlet and outlet, a missing air gap on the drain, or a bypass left half open. The full sequence is in how to install a whole-house water softener. The errors people make most often are in common water softener installation mistakes.
Frequently Asked Questions
Can you connect a water softener with PEX?
Yes. Morton's installation manual lists PEX alongside copper, threaded pipe and CPVC as acceptable for the softener's inlet and outlet plumbing. Use a PEX adapter that suits the softener's connection, usually male thread or the maker's own installation fitting. Support the PEX close to the valve so its flexibility does not load the fittings, and make any copper solder joints before the PEX goes on.
What is the best pipe to connect a water softener?
Whatever matches your house plumbing with the fewest transitions. Copper is rigid and supports the valve well but needs heat. PEX is quick and forgiving but needs support. CPVC is cheap but must be cemented and cured correctly and kept away from the valve's O-rings. Push-fit is fastest and suits tight spaces, but every joint must be deburred and fully seated.
Can you solder near a water softener?
Only with the valve disconnected, or well away from it. Morton says do not solder with plumbing attached to its plastic bypass valve. Clack says to connect its fittings to the plumbing first and fit the nut, split ring and O-ring once solder joints are cool. Fleck and Clack both call for at least 6 inches between solder joints and the drain line flow control fitting.
Do I need a dielectric union on a water softener?
Only where two different metals meet, most often copper to galvanized steel. A dielectric union or an approved brass transition separates them. Copper to a plastic bypass valve needs no dielectric fitting, because the plastic already separates the metals. Any break in a metal water pipe that forms part of the electrical ground needs a bonding jumper across it.
Can you use push-fit fittings on a water softener?
Yes. Push-fit fittings are widely used for softener connections, especially on PEX and copper in tight spaces. They fail when the pipe end is not cut square, not deburred, or not pushed in to the full insertion depth. Mark the depth on the pipe before you insert it, and check that the mark is at the fitting face before you turn the water on.
Can I use flexible braided connectors on a water softener?
Many installers do, because they take up small misalignments and let the softener move slightly without stressing the valve. Use connectors rated for potable water and sized for the line, keep them short, and remember their internal bore is often smaller than the pipe, which adds some pressure drop.
