
Water Softener Planning for New Construction
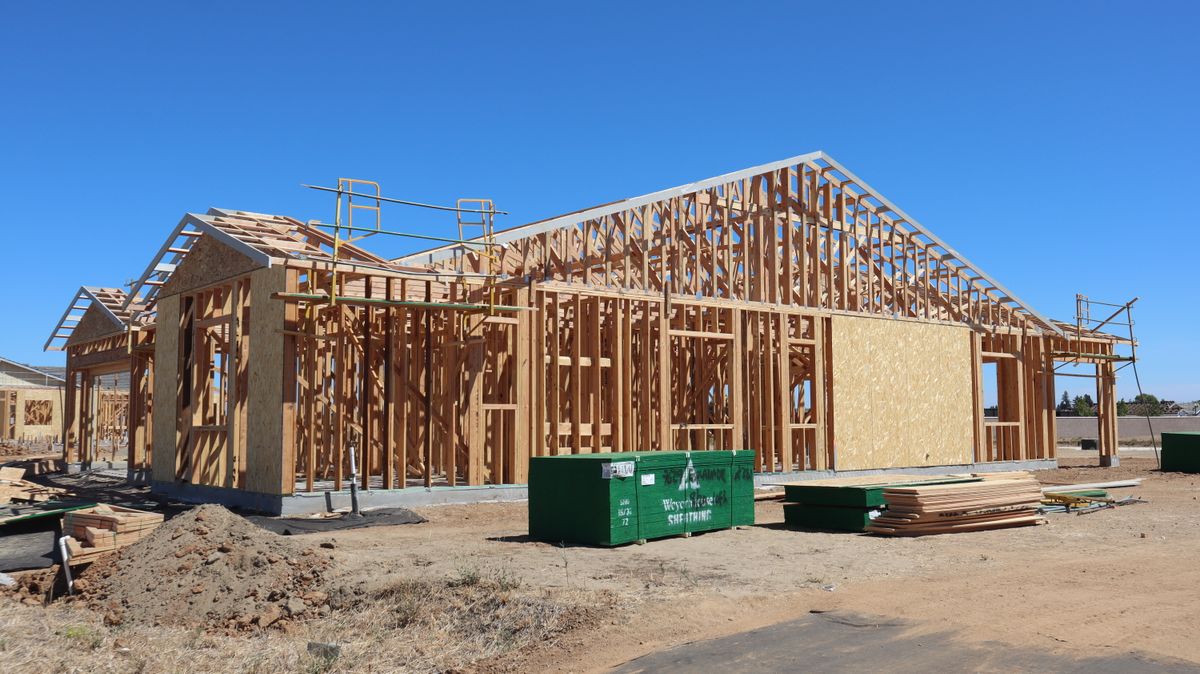
A water softener loop in new construction is a pair of capped or jumpered pipe stubs on the main cold line. Put it after the outdoor tap branch and before the water heater. Add a drain with an air gap and an always-on 120 V outlet a few feet away, and leave enough floor space and headroom for the tanks. At framing stage this costs very little. Once the drywall is up, adding it can mean opening finished walls. The specification below is written so you can hand it straight to your builder.
Most new-home buyers never see the softener loop, because it is roughed in behind the water heater in the garage and sits there unused for years. The second half of this page covers how to find one and put it to use.
Water Softener Loop Rough-In Spec for New Construction
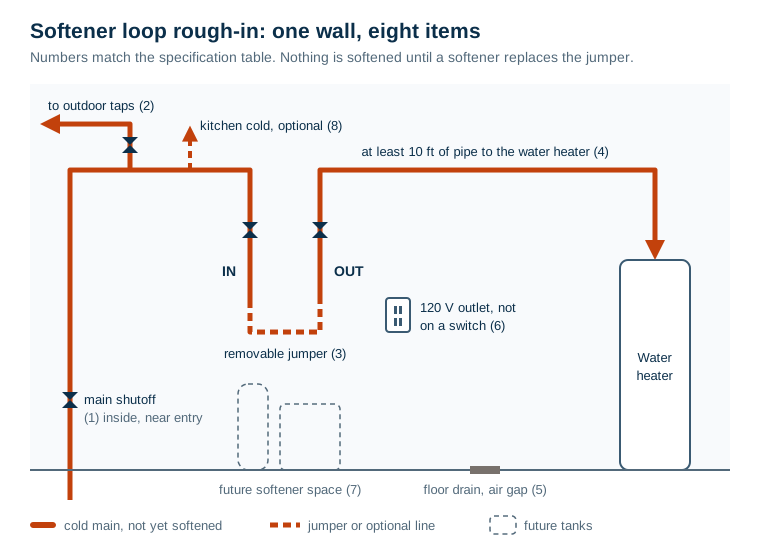
Copy this table into your plumbing and electrical notes. Each numbered item matches a label in the drawing.
| # | Item | Specification | Why |
|---|---|---|---|
| 1 | Location | Conditioned or freeze-protected space near where the main enters. After the main shutoff and before the water heater | The softener must treat water before it is heated and must never freeze |
| 2 | Outdoor tap branch | Tee off the main before the loop, with its own shutoff | Irrigation and hose water do not need softening and would use up capacity and salt |
| 3 | Loop stubs | Inlet and outlet stubs on the full-size main, each with a full-port shutoff valve. Label IN and OUT with flow arrows. Join them with a removable jumper | Lets the softener go in later with no cutting, and makes flow direction obvious |
| 4 | Distance to water heater | At least 10 feet of pipe from the loop outlet to the water heater inlet | One manufacturer's minimum, limiting how far hot water can back up into the softener |
| 5 | Drain | A floor drain, laundry standpipe or dedicated receptor within a few feet of the loop, with room to fix the drain line above it with an air gap | Every regeneration discharges backwash and rinse water |
| 6 | Outlet | A 115/120 V receptacle within cord reach, not controlled by a switch | Control valves need uninterrupted power to keep time and start regeneration |
| 7 | Space | About 30 x 24 in of floor for a two-tank softener, 24 in clear in front, and at least 12 in above the valve | Salt loading and valve service need working room |
| 8 | Optional branches | A separate unsoftened cold line to the kitchen sink if wanted; a bonding jumper across the loop if the electrical system is grounded to metal piping | Easy now, disruptive later |
Why Each Item Is There
Items 1 and 4: upstream of the water heater, with distance. A softener protects the water heater only if it sits ahead of it. The Water-Right Impression Plus manual goes further. It does not recommend installing any water treatment unit with "less than 10 feet of piping between its outlet and the inlet of a water heater." Builders like to put the loop right beside the water heater. If that is the only spot, run the pipe so it still meets the distance. The general placement rules are covered in where a whole-house water softener should be installed.
Item 2: the outdoor tap branch. This is the item most often done wrong. If the hose bibs are downstream of the loop, every hour of lawn watering uses softened water. That costs salt and regeneration water and brings no benefit to the lawn. Water-Right's manual says that if it "is desired to bypass outside hydrants, a cold water kitchen sink, or other locations, provisions should be made at this time", meaning when the plumbing is being run. When outdoor taps should and should not be softened is covered in should outdoor faucets bypass a water softener.
Item 3: a loop that can be used without cutting. Two stubs joined by a jumper keep water flowing until a softener arrives. Put a shutoff on each stub, and installing a softener becomes: close both valves, remove the jumper, and connect the softener's bypass. Labels and flow arrows prevent the most common installation mistake, which is a softener connected backward.
Item 5: the drain, with an air gap and a low opening. The softener's drain line has to end above the drain opening, not sealed into it. The Fleck 5600SXT service manual requires an air gap of twice the drain line's diameter, with a minimum of 1 inch. Water-Right asks for 1-1/2 inches or twice the pipe diameter, whichever is greater. There is a second requirement that builders miss: the brine tank overflow is a gravity line, and it has to reach a drain opening lower than the overflow fitting on the side of the brine tank. A floor drain or a low receptor handles both lines. A tall standpipe handles only the pressurized drain line.
Item 6: power that is always on. Water-Right lists a "115/120V, 60Hz uninterrupted outlet," and Fleck warns that the power adapter must not be on a switched outlet. Tell the electrician it is for a water softener. They will know whether the location needs GFCI protection under your local code, and whether the outlet should be on a circuit that is never switched off with the garage lights.
Item 7: space. Put the loop where the tanks can stand beside it, not behind the water heater, and keep shelving and ducts off the wall above it. The valve has to lift straight up off the tank for service, so a shelf directly over the loop defeats the purpose of planning ahead.
Item 8: the optional branches. Some owners want an unsoftened cold tap at the kitchen sink. Running that line now means a separate pipe from before the loop. Later, it means opening the kitchen wall. Separately, Water-Right says that if "the building's electrical system is grounded to the plumbing," you should install a copper grounding strap from the inlet to the outlet pipe. A plastic softener in a metal pipe run otherwise breaks that path. Ask the electrician to put a bonding jumper across the loop at rough-in if the house relies on metal piping for bonding.
If the house is on a well, add one more item: room on the same wall for a sediment filter ahead of the loop, and space for an iron filter if the water test calls for one.
How to Hand This to Your Builder
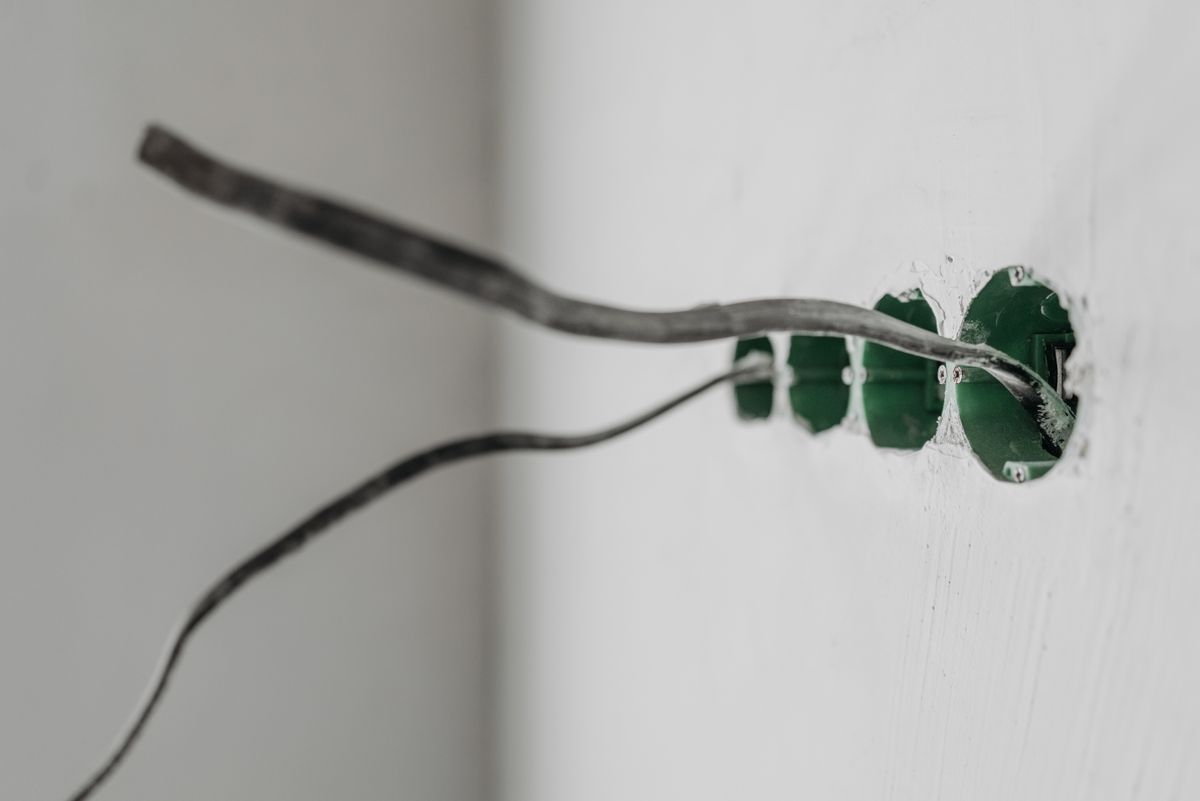
Builders work from plans and change orders, not from articles. Three things make the request stick.
- Put it in writing as a change order or plan note, with the table above attached. "Softener loop" on its own gets you two stubs anywhere the plumber likes.
- Mark the location on the floor plan, with the outdoor tap branch, the water heater and the drain shown. Ask for the loop, drain and outlet on the same wall.
- Walk it at rough-in, before insulation and drywall. Check that the hose bib lines tee off before the loop, that the loop stubs are on the cold main and not the water heater line, that the drain opening is low enough for the overflow, and that the outlet is not on a switch. Take photos with a tape measure in the frame. Those photos are also useful for any later work, as covered in water softener planning during a remodel.
Recognizing a Loop Your Builder Already Installed
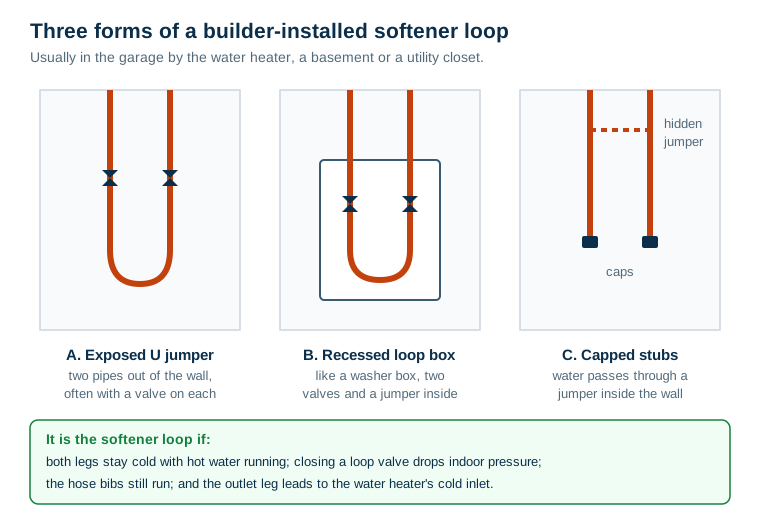
Many houses built in hard water areas already have a loop, and many owners never notice it. It usually takes one of three forms.
- An exposed U-shaped jumper. Two pipes come out of the wall, usually in the garage near the water heater, and are joined by a short U of copper or PEX. Sometimes there is a valve on each leg.
- A recessed loop box. This is a plastic box in the wall, similar to a washer box, with two valves and a jumper inside. Sometimes there is a drain in the same box.
- Two capped stubs. The main is already routed through two stubs that were capped off, and water passes through a jumper inside the wall. This form is less common, and it is the hardest to spot.
How to confirm it is the softener loop and not a recirculation line or an irrigation branch:
- Both pipes are cold. Run hot water for a few minutes. A softener loop stays cold. If one leg warms up, it is on the hot side.
- It is on the whole-house main. Close one loop valve, if there are valves, and check that the indoor taps lose pressure.
- The outdoor taps are not on it. With the loop valves closed, a hose bib that still runs is on a branch before the loop, which is what you want.
- It sits before the water heater. Follow the pipe from the loop outlet. It should lead to the cold inlet of the water heater and the rest of the house.
Which stub is the inlet, when there is no label, is determined in how to confirm water flow direction at a softener loop. Get this right before connecting anything, because a softener connected backward does not soften properly and can push resin toward the house plumbing.
Common Rough-In Mistakes
- The hose bibs are on the loop, so the softener treats lawn water.
- The loop is on the water heater's feed after it has already branched to other fixtures, so some cold taps stay hard.
- There is no drain within reach, or only a standpipe too high for the gravity overflow.
- The outlet is on a switch or on the garage door opener's ceiling receptacle.
- The loop is in an exterior garage wall in a cold climate, where the stubs and the future softener can freeze.
- No shutoff valves on the stubs, so installing a softener means shutting off the whole house and cutting pipe anyway.
What a Loop Cannot Do
A loop is only plumbing. It does not decide whether you need a softener. Test your water once you have a supply connection. If the hardness is low, you may never use the loop, and that is fine. A softener installed on the loop removes hardness and a little dissolved iron, but it does not disinfect water or remove most contaminants. The Minnesota Department of Health also advises against a softener drain line that is "excessively long, elevated, or reduced in diameter beyond the manufacturer's recommendation," which is one more reason to put the drain right beside the loop while the walls are still open.
Frequently Asked Questions
What is a water softener loop?
A softener loop is a pair of pipe stubs, an inlet and an outlet, that a builder brings out of the wall on the main cold supply, at a point before the water heater and after the outdoor tap branch. Until a softener is installed, the two stubs are joined by a short jumper so water flows straight through. Installing the softener means removing the jumper and connecting the softener's bypass valve to the two stubs.
Should I put a water softener loop in my new house?
Yes, if there is any chance you will want a softener. A loop, a nearby drain and an always-on outlet cost very little at the rough-in stage. Adding them later can mean opening finished walls or ceilings and rerouting the main. Even owners on soft city water sometimes add a loop for resale or for future whole-house filtration.
Where should the softener loop be located?
Close to where the main water line enters, after the branch to the outdoor taps and before the water heater, in a space that stays above freezing. One manufacturer, Water-Right, recommends at least 10 feet of pipe between the softener outlet and the water heater. The spot also needs a drain, an outlet and enough room around and above the tanks.
Do outdoor faucets go on the softener loop?
Usually not. The outdoor tap branch is normally tee'd off the main before the loop, so lawn and garden water does not use up softener capacity and salt. Water-Right's manual says that if you want to bypass outside hydrants or a cold water kitchen sink, provisions should be made when the plumbing is installed.
How do I know if my house has a softener loop?
Look near where the main enters, often in the garage beside the water heater, in a basement or in a utility closet. A loop usually shows up as two pipes coming out of the wall and joined by a U-shaped jumper, a recessed box with two valves, or two capped stubs. Both pipes are cold, and they should be on the main before the water heater.
Does a softener loop need a drain?
The loop itself does not, but the softener does. Every regeneration sends backwash and rinse water to a drain through an air gap. Ask the builder for a floor drain, a laundry standpipe or a dedicated receptor within a few feet of the loop. A loop with no drain nearby is one of the most common rough-in mistakes.
