
How to Clean and Service a Water Softener Control Valve
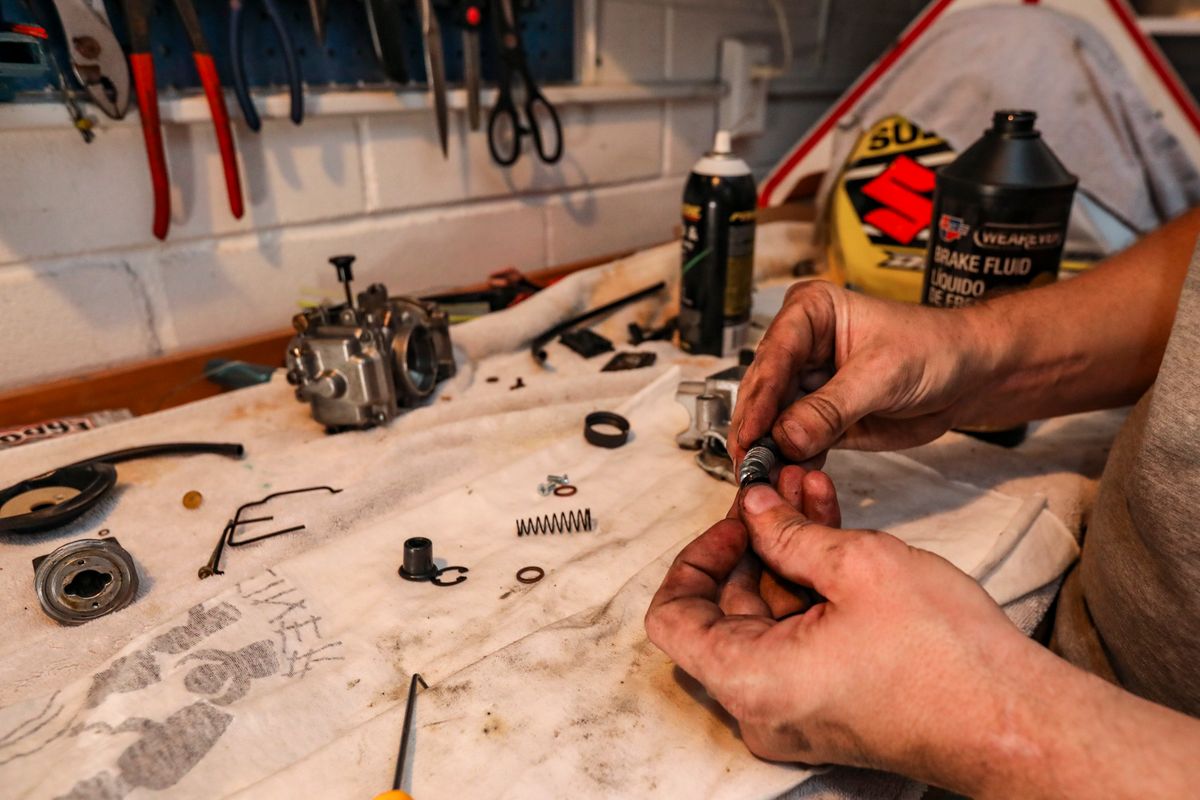
To clean a water softener control valve, put it in bypass and depressurise it, remove the powerhead or drive assembly, and pull out the piston and the seal and spacer stack. Clean the piston in dilute vinegar, replace the seals, and reassemble using silicone lubricant only. On a Fleck 5600 or Clack WS1 this is an hour's job, done without taking the valve off the tank.
The rebuild is not hard. It gets expensive when petroleum grease goes on the seals, when a part is forced into its bore, or when screws cut new threads. All three are covered below, valve by valve.
Will Cleaning the Water Softener Control Valve Fix It?
A seal and piston service fixes faults that come from water getting past a seal inside the valve. It will not fix a motor, a board, or a position sensor. Match your symptom first.
| Symptom | What the manuals list | Rebuild fixes it? |
|---|---|---|
| Water trickles to the drain in service, between regenerations | Fleck: "Internal control leak — Replace seals and piston assembly." Clack: damaged seal/stack assembly, piston failure, drive cap not tightened properly | Yes |
| Hard water, although the unit regenerates and draws brine | Fleck: "Internal valve leak — Replace seals and spacers and/or piston." Clack: damaged seal/stack assembly | Usually, once bypass, brine and resin are ruled out |
| Pressure loss after plumbing work or on iron-rich water | Fleck: inlet plugged by debris "broken loose from pipes" or iron buildup — "Remove piston and clean control" | Yes, by cleaning |
| Softener fails to draw brine | Fleck lists an internal control leak alongside a plugged injector. Clack lists a faulty regenerant piston | Sometimes. Clean the injector first, because it is quicker |
| Valve stuck mid-cycle, motor hums | Piston binding in fouled seals, or a drive fault | Sometimes. See a water softener stuck in regeneration to isolate it |
| Leak on the outside of the head | O-ring, cap or crack | Only if it is the piston end seal. See leaking at the control head |
If you are not sure which part of the cycle is failing, how a water softener control valve works maps each symptom to the valve position that produces it.
The Lubricant Rule: Silicone Only
This is the one thing to get right. It is also the most common way owners turn a fifty-dollar repair into a new valve.
What the manufacturers say:
- Clack: "Use only silicone-based lubricants on all Clack Corporation components. Hydrocarbons will damage components that contain o-rings and/or plastic. This can cause leaks or breakage." It names Vaseline/petroleum jelly and WD-40, adds "do not use ... spray silicone anywhere," and says a silicone lubricant "may be used on black o-rings but is not necessary" (Clack WS1 and WS1.25 drawings and service manual).
- Pentair Fleck: every O-ring step in the 5600SXT service instructions says "apply silicone lubricant," and the installation notes say "only use silicone lubricant."
- Pentair Autotrol: "Do not use petroleum based lubricants such as petroleum jelly, oils, or hydrocarbon based lubricants. Use only 100% silicone lubricants." It warns that non-silicone grease "may cause plastic components to fail over time" (Autotrol 740/760 and 255/Performa service manual).
Why it matters. Petroleum products make many rubber compounds swell and soften, and they attack some plastics. A swollen seal grips the piston, the motor stalls, and the valve either sticks or tears the new seal on its first stroke. The damage does not show until the unit is back in service, which is why it is so often blamed on "a bad kit."
What that means in practice:
- Buy a tube of silicone O-ring grease. Plumbing suppliers sell it as faucet or O-ring grease; the label will say 100% silicone.
- Use a thin film. Grease attracts grit, and too much can foul the injector and flow controls downstream.
- Clack pistons go in dry. The manual says the stack's clear lip seals "have a special slippery coating so that the piston does not need to be lubricated."
- Never lubricate gears or the motor. Clack says so directly, and warns that oil on the reflective drive gear can upset the optical position counting.
Parts-Kit Reference by Valve Family
Order by the valve's model, not the softener's brand name. Many different softener brands use the same Fleck, Clack or Autotrol valve. The numbers below are taken from each manufacturer's current service manual.
| Valve | What wears | Parts named in the manual | Notes |
|---|---|---|---|
| Fleck 5600 / 5600SXT | Five seals and four spacers in the valve bore, plus the piston | Seal & Spacer Kit 60125 (listed for 5600/9000); individual seal 13242, spacer 14241; piston assembly listed separately | Brine valve and injector are separate service items on the injector body |
| Clack WS1 (1-inch) | One-piece spacer stack with lip seals; main and regenerant pistons | Spacer stack V3005-02; downflow softener main piston V3011; regenerant piston V3174 | The stack is replaced whole. Clack says not to disassemble it |
| Clack WS1.25 | As WS1, larger bore | Spacer stack V3430-01; downflow main piston V3407; regenerant piston V3174 | Same procedure as WS1 |
| Autotrol 255 / Logix and Performa | Rubber valve discs opened by a camshaft; disc spring | Valve discs, spring and top plate are listed by position in the manual's parts pages | Pentair says the discs "will usually not need to be changed". Confirm one is failing before opening it |
Upflow and downflow are not interchangeable. Clack's manual warns that a mismatched valve body and piston "will result in hard water bypass during service." If your WS1 body has no DN marking under the injector cap, it is an upflow body, so check the upflow part number before ordering.
Rebuild 1: Fleck 5600 Seals, Spacers and Piston
This sequence follows the Fleck 5600SXT service instructions.
Prepare:
- Put the softener in bypass (or close the inlet valve on a three-valve bypass).
- Relieve pressure by stepping the control into Backwash for a moment, then back to In Service.
- Unplug the power.
Remove:
- Take off the back cover and the front cover. Disconnect the meter signal wire from the front cover and feed it back through the control.
- Remove the screw and washer at the drive yoke, then the timer mounting screws. The whole timer (powerhead) lifts off.
- Remove the end plug retainer plate.
- Pull upward on the piston rod yoke until the piston assembly comes out of the valve.
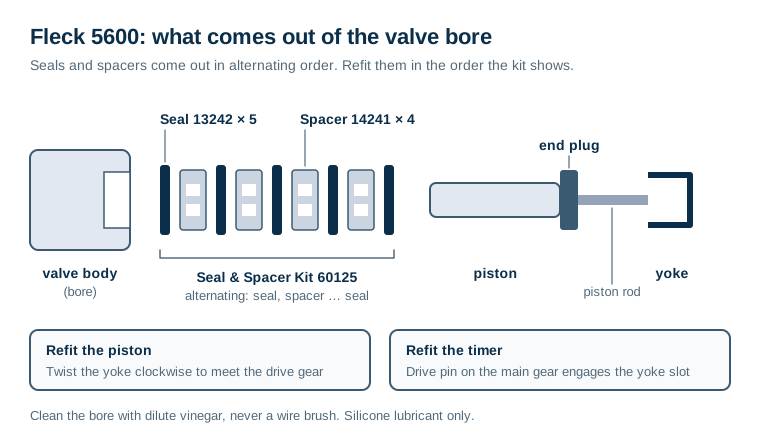
- Remove the seals and spacers. They come out in alternating order. Work slowly with a tool that will not scratch the bore, and look into the bore with a flashlight when it is empty. Fleck's piston instructions say to make sure "there is no foreign matter that would interfere with the valve operation."
Clean and inspect:
- Wipe the bore clean. Loosen iron or scale with dilute vinegar on a soft cloth, never a wire brush or abrasive.
- Check the piston surface. Light staining that cleans off is fine. Scoring, pitting or a rough band means replace it.
Install:
- Fit the new seals and spacers in the order the kit shows, lightly coated with silicone only where the kit instructions say to.
- Push the piston back into the valve by means of the end plug. Twist the yoke carefully clockwise to align it with the drive gear, then refit the end plug retainer plate.
- Put the timer back on the valve, making sure the drive pin on the main gear engages the slot in the drive yoke. Refit the timer screws and the yoke screw and washer.
- Return to service slowly, refit the covers, plug in, set the time of day, and cycle the valve manually through every position.
Rebuild 2: Clack WS1 and WS1.25 Pistons and Spacer Stack
This follows Clack's WS1/WS1.25 drawings and service manual.
Prepare: bypass, then start a regeneration briefly or open a softened tap to drop the pressure. Unplug the power. Disconnect the drain line if it will spill.
Remove the drive assembly:
- Unplug the power and meter connectors from the circuit board and unweave the wires from the side holders.
- Lift the two tabs on top of the drive back plate and ease the drive bracket forward, then lift it off its lower notches. The board can stay on the bracket.
Remove the drive cap and pistons:
- Turn the drive cap assembly counterclockwise with Clack's plastic service wrench, or a flat screwdriver used as a lever in the slots against the notches of the back plate. Once it is loose, unscrew it by hand and pull it straight out. The pistons come out with it.
- Unsnap the small regenerant piston from the back of the main piston by pressing sideways. Fully extend the rod and unsnap the main piston by pressing on the side with the number.
- Clean both pistons in dilute sodium bisulfite or vinegar, or replace them. The drive cap assembly itself is not serviceable. Its only replaceable part is the O-ring.
Remove and refit the stack:
- Pull the spacer stack out with your thumb and forefinger. Inspect the black O-rings and clear lip seals. Replace the whole stack if either is worn. Do not take it apart.
- To refit, push it into the bore by hand, or with a blunt object 5/8 to 1-1/8 inch across pressing on its centre. It is seated when at least four threads are exposed (about 5/8 inch). Do not force it. Clack allows a little silicone on the bore to help it slide in.
Reassemble and reset:
- Reattach the main piston, then the regenerant piston. Thread the drive cap assembly in by hand, then tighten it using a screwdriver as a ratchet until the black O-ring on the stack is no longer visible through the drain port.
- Check that the main drive gear still turns freely. Refit the drive bracket so it snaps under both latches.
- Reset the electronics: unplug and replug the power jack at the board, or hold NEXT and REGEN for three seconds (SET and DOWN on three-button TC boards). Clack says this "establishes the service piston position."
Autotrol 255: Valve Discs Instead of Seals
Autotrol's 255 valve uses a different design. A camshaft pushes rubber valve discs open against a spring. There is no piston and no seal stack. Pentair notes the discs are made from a chloramine-resistant rubber and usually do not need changing, so confirm a specific disc is failing before you take the top plate off. The sealing surface to inspect is the raised ridge under each disc's top shoulder. Check each cavity for debris.
Reassembly is where these valves get damaged. See the screw procedure in the next section.
Seating and Tightening Cautions
None of these three manuals gives a torque figure for the parts you touch in a rebuild. Instead, each gives a physical check that tells you when to stop. Use those checks, not a wrench.
| Part | The check | What forcing it does |
|---|---|---|
| Clack spacer stack | Stops with at least four threads (about 5/8 in) exposed | A stack forced past its seat can distort its seals |
| Clack drive cap | Tighten until the stack's black O-ring disappears from view through the drain port | Clack: "Excessive force can break the notches molded into the drive back plate" |
| Clack caps and nuts | "Firmly hand tightened because radial seals are used" | Pipe wrenches and hammered screwdrivers crack caps |
| Fleck piston and yoke | Twist the yoke clockwise to meet the drive gear, and engage the drive pin in the yoke slot | A misaligned yoke lets the powerhead lose its position |
| Fleck injector body screws | Tighten snugly and evenly | Overtightening cracks the cap or pinches O-rings |
| Autotrol top plate screws | Use the same screws, and turn each one backwards until it "clicks" into its old thread. Start them criss-cross from the corners and tighten in the same pattern | Pentair: if new threads are cut, "the holding power of the screw is lost. Under pressure the valve can leak." |
| Autotrol valve discs | Each disc pressed fully into the cavity that matches its shoulder size, shoulder level with the valve | Pentair: "If the valve disc fits properly in the cavity, it will work correctly" |
After the Rebuild: Proving It
- Leak check under pressure. Ease the bypass open. Look for drips at every seal you disturbed.
- Step through a full regeneration manually and watch each position. The valve should move cleanly and stop in each step.
- Watch the drain in service. Put your ear to the drain line or run the drain into a bucket for a few minutes. It should be silent and dry between regenerations. If it still trickles, see why a water softener is constantly draining.
- Test hardness at a cold tap after the first full regeneration.
When to Stop and Replace Instead
- The valve body is cracked, often from freezing. No seal kit fixes that.
- The bore is scored, so new seals leak again within weeks.
- Parts are no longer made for a proprietary valve.
- Several things are failing at once, such as motor, board and resin. Price the whole system before you rebuild piece by piece.
Replacing the valve does not have to mean replacing the softener. Choosing a replacement head that matches your tank's thread and riser keeps a sound tank and resin in service.
If you do replace, the two valves serviced above are where most buyers land. The Fleck 5600SXT review compares what four complete softeners built on it actually ship, and the Clack WS1 review covers its programming menus and what its service parts cost.
If the job gets beyond what you want to take on, calling a water softener technician with the valve model and the symptom already identified shortens the visit.
Cleaning and servicing a water softener control valve comes down to three rules: silicone only, never force a part into its seat, and follow the manual's own seating check. Keep to those and a seal kit really is a fraction of the cost of a new valve.
Frequently Asked Questions
Can you clean a water softener control valve?
Yes. The internal parts that wear or foul, meaning the piston, the seals and spacers and on some valves the injector and flow controls, can be removed, cleaned and replaced without taking the valve off the tank on common designs such as the Fleck 5600 and Clack WS1. Clack's service manual says pistons and the spacer stack can be cleaned in dilute sodium bisulfite or vinegar. Worn seals are replaced, not cleaned.
What lubricant should I use on water softener seals and O-rings?
Silicone only. Fleck's 5600SXT instructions specify silicone lubricant on every O-ring, Autotrol's manual says to use only 100% silicone lubricants, and Clack warns that hydrocarbon lubricants such as petroleum jelly and WD-40 damage O-rings and plastic and can cause leaks or breakage. Clack also advises against spray silicone and says its piston needs no lubricant because the lip seals have a slippery coating.
How do I know if my softener needs new seals and spacers?
The classic signs are water running to the drain when the softener should be in service, hard water getting through even though the unit regenerates and draws brine, and a piston that is stiff to move. Fleck's troubleshooting table lists an internal valve leak, fixed by replacing seals and spacers and/or the piston, as a cause of hard water and of a drain that flows continuously. Clack lists a damaged seal or stack assembly for the same symptoms.
Should I replace the piston when I replace the seals?
If the piston is scored, pitted, or coated in iron that will not clean off, yes, because a rough piston cuts new seals quickly. A smooth, clean piston can go back in. Fleck's troubleshooting table tells you to replace seals and spacers and/or the piston, and several of its entries say to replace seals, spacers and the piston together. Doing both at once saves opening the valve twice.
Is it worth rebuilding an old water softener valve?
Usually, if parts are available and the valve body is not cracked. Seal kits, stacks and pistons for widely used valves such as the Fleck 5600 and Clack WS1 are sold individually. It is not worth it when the body is cracked, when the valve is a proprietary design with no parts support, or when the resin, motor and board are all failing at the same time.
