
What to Do With a Softener After Basement Flooding
A water softener after flooding is judged part by part. If floodwater reached the control head, replace it, because submerged motors, boards and transformers are not safe to reuse. A soaked brine tank can be emptied, scrubbed and disinfected. The resin can often be saved, but only after the system is sanitized and a lab bacteria test comes back clean. Leave it in bypass until then.
So the question is not whether the whole softener is ruined. It is which of its three parts went under the water, how the floodwater got in, and what it takes to prove the water is safe to drink again. Work through those in order and you usually end up paying for one part, not a new system.
First Hour: Power, Bypass, Photographs
Do these three things before you clean anything, move the unit or throw anything away.
1. Kill the power at the breaker, not the plug. Don't wade through standing water to reach an outlet. A softener's transformer usually plugs into a basement receptacle near the floor, which is exactly where the water was. If the breaker panel is in the flooded area as well, wait for an electrician.
2. Isolate the softener. Turn the bypass valve to bypass. If the bypass itself was underwater and won't turn, or you can't reach it safely, close the main shutoff. On a well that means switching off the pump circuit too. Whatever the softener holds now, you don't want it moving into the house pipes.
3. Photograph everything where it stands. Get the waterline on the cabinet and tanks, the rating decal with model and serial number, the salt and water in the brine tank, the drain line and the place it ends, and the outlet the unit was plugged into. Take the photos before you wipe down, drain or move anything. These pictures are evidence for the insurance claim and for the decisions below, and you can't take them again later.
Which Part Went Under? The Decision Tree
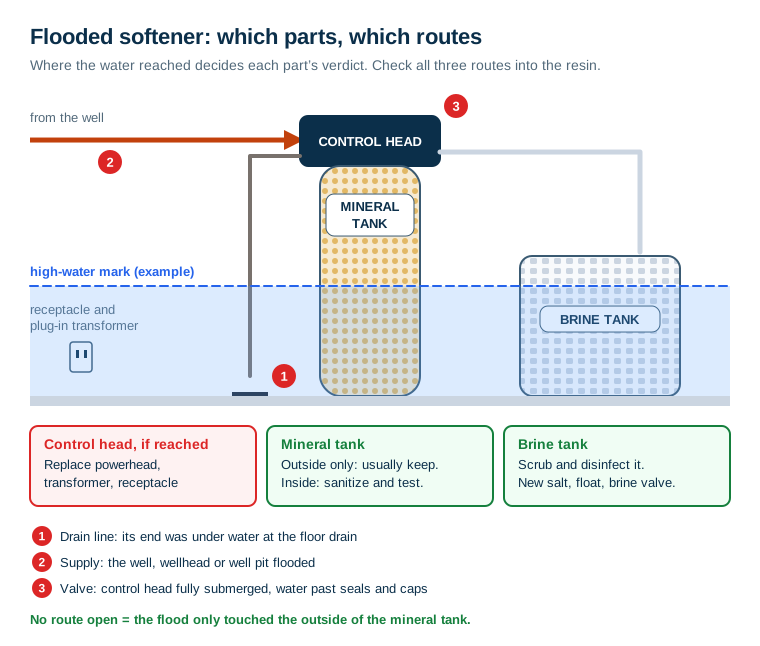
Find the high-water mark on the wall or the cabinet, then compare it with where each part of the softener sits. There are three components, and each has its own honest verdict.
| What the water reached | Verdict | Why |
|---|---|---|
| Control head (valve motor, circuit board, display, transformer) | Replace the powerhead and transformer. The valve body itself can sometimes be kept, but only after cleaning and a new seal kit | Floodwater leaves silt and corrosive residue inside electrical parts. Guidance on flooded electrical equipment treats submerged controllers as replace-only |
| Brine tank (salt, brine well, float, safety valve) | Salvage the tank, replace the small parts. Throw out every grain of salt | The tank is plastic and can be scrubbed and disinfected. The float and brine valve cost little compared with the risk of reusing them contaminated |
| Mineral tank (outside only, valve above the water) | Usually keep it. Clean the outside, sanitize through normal regeneration, then test | The tank is a sealed pressure vessel. Water on the outside doesn't mean water in the resin, as long as none of the three entry routes below were open |
| Mineral tank with contaminated water inside | Sanitize and test, or rebed. Replace the resin if it is old, if the flood carried sewage, or if the bacteria test fails after sanitizing | Resin can be disinfected, but heavy chlorine shortens its life. Old resin rarely justifies the effort |
| All-in-one cabinet unit, water above the base | Usually replace the whole unit | The control, brine and resin are packaged together, so a flood that reaches the cabinet usually reaches the electronics |
The mineral tank verdict depends on how the floodwater could have got inside. There are three routes, and you should check all of them:
- Through the drain line. Softener drains usually end at a floor drain, a standpipe or a laundry tub. A basement flood often comes up through exactly that floor drain. If the end of the softener's drain hose was under water, dirty water may have been pulled or pushed back into the valve, and you should assume the resin was exposed.
- Through the supply. If the well flooded, or the wellhead or well pit was under water, contaminated water went through the resin with every gallon the house used. It doesn't matter if the basement stayed dry.
- Through the valve. If the control head was fully submerged, water can get past seals and caps into the valve's flow paths.
If none of those routes was open, the flood only touched the outside of the mineral tank. That is the best result you can hope for.
The Electrical Verdict: Why the Control Head Rarely Comes Back
It's tempting to dry the control out with a fan, plug it back in and see what happens. Sometimes it even works for a while. That is the problem.
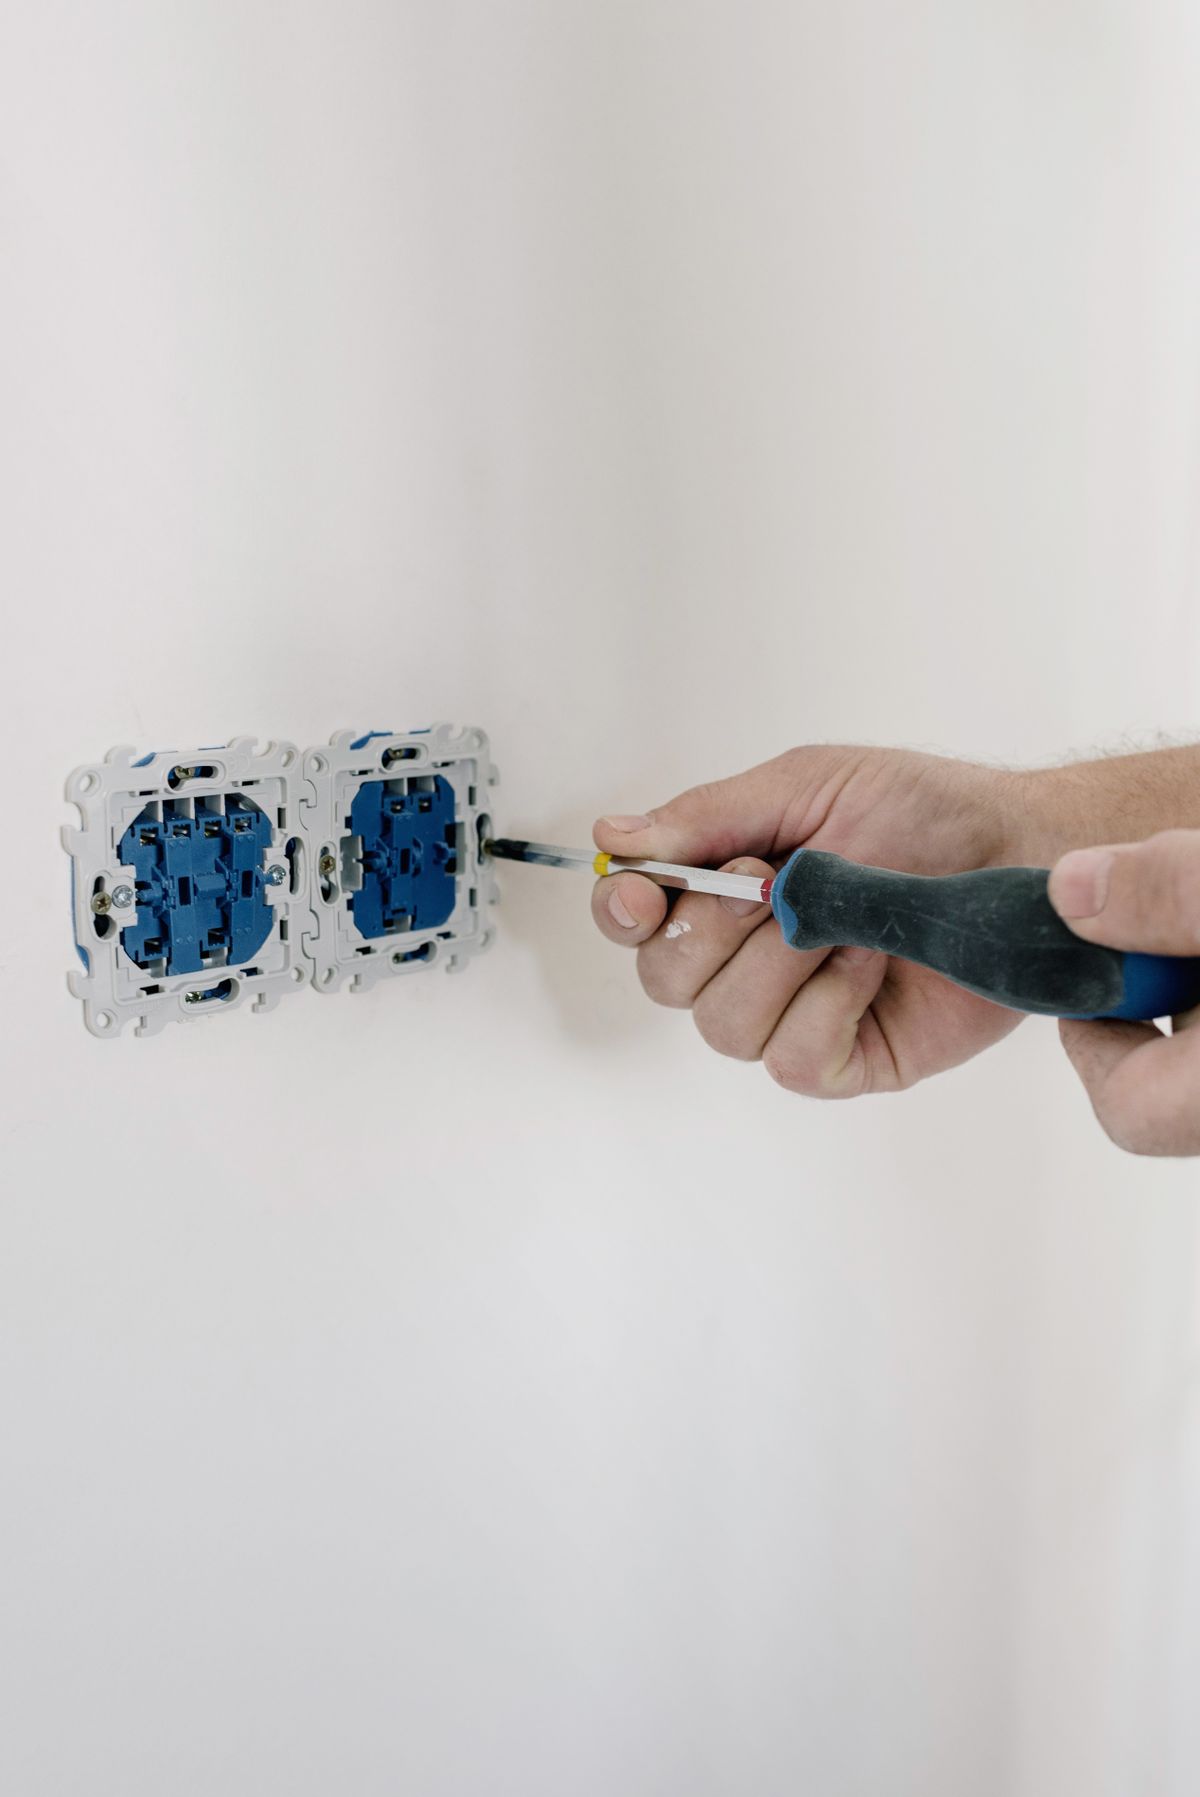
The Minnesota Department of Labor and Industry's recommendations for electrical equipment damaged by floodwaters say that "controllers and similar devices that have been submerged must be replaced". They list pumps, pump controls and water heaters among the appliances to replace, and they say that submerged receptacle outlets must be replaced too. The one exception is equipment designed to be submerged, such as a submersible well pump. A softener's motor, board and transformer aren't built for that.
In practice, the electrical side breaks down like this:
- Transformer or power supply. Replace it. It's cheap and sold as a separate part for most common valves.
- Receptacle it plugged into. Have it replaced, along with anything else on that circuit that was under water. That is electrician's work.
- Powerhead: motor, board and display. Replace it. For widely used valves (Fleck, Clack, Autotrol and similar), you can buy the powerhead without the valve body.
- Valve body, piston and seals. These are mechanical parts. A body that was submerged can be cleaned and given a new seal-and-spacer kit. How much that job involves is covered in servicing a water softener control valve.
A dried-out board that powers up doesn't prove anything. Corrosion under the components can take weeks to show up as intermittent resets, lost programming or a valve that stops mid-cycle. If a board that survived a flood later starts forgetting its time and hardness settings, a softener that keeps losing its settings is often where you end up.
Before Sanitizing: If the Well Flooded Too
If the flood also covered the wellhead, filled a well pit or ran into the casing, the well has to be dealt with first. Sanitizing a softener and then feeding it contaminated well water undoes the job.
The CDC's guidance on how to disinfect wells after an emergency says two things that matter here. First, "the disinfection process may damage water softeners due to the large amounts of chlorine used," so keep the unit bypassed and follow the manufacturer's instructions. Second, until the water has been tested, boil it or use another source. The Minnesota Department of Health's flooded-well guidance goes further: disconnect any softeners and filters, and ask your dealer how to disinfect them if they were exposed to floodwater.
So the order is:
- Well first. Shock-chlorinate the well, ideally with a well contractor, since flooded wellheads and pits carry their own electrical and confined-space hazards. Keep the softener bypassed the whole time.
- Flush the well. Run the chlorinated water out through an outside tap until the chlorine is gone. Don't send it through the softener.
- Softener second. Sanitize the softener at its own, much lower, dose (below).
Chlorine strong enough to disinfect a well is far stronger than resin should ever see. Why that matters for the bed's lifespan is explained in how chlorine damages softener resin.
The Sanitizing Protocol, Step by Step
Do this after the electrical parts are replaced or cleared, and after the well (if it flooded) has been disinfected and flushed.
Brine tank
- Scoop out and throw away all the salt. Salt that sat in floodwater is contaminated and may have turned to mush.
- Remove the brine well, float assembly and grid plate if there is one. Scrub the tank walls and floor with warm water and a little dish soap, then rinse.
- Replace the safety float and brine valve if they were submerged. They cost little, and they're hard to clean properly.
- Wipe every surface with a dilute bleach solution, then rinse. The full routine for a normal brine tank clean is in how to clean a water softener brine tank.
- Reassemble the tank, add a few inches of water and fresh salt.
Resin and valve
- Take the softener out of bypass so it has water pressure.
- Pour household bleach into the brine well at the dose your manual gives. There are manufacturer figures you can compare with. Hellenbrand's ProMate consumer manual specifies 1.2 fluid ounces of 5.25% sodium hypochlorite per cubic foot of softening resin, added to the brine well before a normal regeneration. The same manual says to adjust the dose if you use a stronger solution, so check the percentage on your bottle and scale down to match. Use plain unscented bleach.
- Start a manual regeneration so the chlorinated brine is drawn through the bed and rinsed to drain. The button sequence for common valves is in how to manually regenerate a water softener.
- When it has finished, run a second normal regeneration with plain brine to rinse out any leftover chlorine and bring the bed back to full capacity.
- Run a cold tap until any chlorine smell is gone.
What this protocol can't do. Sanitizing kills bacteria in the bed. It doesn't remove silt, oil or chemicals that the flood may have carried in. If the floodwater was obviously sewage, fuel or chemical contaminated, or the resin is already near the end of its service life, a rebed is often cheaper than trying to sanitize old resin and then retesting it. How to judge how much life is left in the bed is covered in water softener resin life and replacement.
The Test That Decides When You Can Drink It

A softener that looks clean, regenerates normally and delivers soft water has still not been shown to be safe. Only a lab result can show that.
What to test for. Total coliform, plus E. coli or fecal coliform. These are the indicators the CDC names for confirming well water is safe after disinfection. Use a certified lab. Your county or state health department can tell you which labs are accredited for drinking water.
When to take the sample. The CDC says to wait at least 7 to 10 days after disinfecting a well so that all the chlorine has been flushed out. Sampling while chlorine is still in the lines can produce a false "clean" result. Take the sample from a cold tap after the softener, not at the tank tee, because you're testing the water that went through the resin.
Until the result is back. Keep drinking and cooking with bottled water, or with boiled water as the CDC advises (a rolling boil for 1 minute). You can take the softener out of bypass for washing and bathing once it has been sanitized, if you want the soft water back sooner. Drinking water waits for the lab.
If the test fails. Sanitize again and retest. If it fails a second time, stop trying to rescue the resin. A bed that keeps testing positive after two disinfections is holding contamination you can't get out cheaply, and rebedding costs less than repeated testing.
Insurance: Documenting the Softener for a Claim

Softeners often get lost in a flood claim, because the adjuster is looking at drywall and furnaces. Make sure yours is on the list.
What the flood policy says. If you have flood insurance through the National Flood Insurance Program, the NFIP Dwelling Form policy limits basement coverage to a short list of named items. That list includes "water softeners and the chemicals in them, water filters, and faucets installed as an integral part of the plumbing system," and separately "well water tanks and pumps." A private flood policy or other coverage will have its own wording, so read yours rather than assuming.
What the policy asks of you. The same NFIP form requires you to show the adjuster the damaged property, prepare an inventory of the damage, and send a signed and sworn proof of loss within 60 days of the loss.
Your softener evidence file:
| Item | Why it matters |
|---|---|
| Photos of the waterline on the softener, taken before cleanup | Shows which components were submerged, which is what decides repair or replace |
| Rating decal: brand, model, serial number | Identifies the unit and its replacement cost |
| Original purchase invoice or installation receipt | Establishes age and value |
| The damaged powerhead, transformer and salt (or photos of them) | The policy says you must be able to show damaged property. Don't throw parts away before the adjuster has seen them or agreed in writing that you can |
| Electrician's note on the receptacle and circuit | Links the electrical replacement to the flood |
| Receipts for new parts, bleach, salt and the bacteria test | Cleanup and restoration costs, with dates |
| The lab bacteria results | Shows why the system couldn't return to service straight away |
Before replacing the whole system, get a written repair estimate that lists the parts. An adjuster is more likely to accept "powerhead, transformer, brine float, sanitizing and test" than a lump-sum replacement quote. That list is also the honest answer for most basements.
Water Softener After Flooding: The First Week Back in Service
Once the lab result is clean and the softener is back in service:
- Reprogram the control. A new powerhead ships with factory defaults, so enter the time of day, hardness and regeneration settings again. If the flood also changed your well water, which sometimes happens after surface water gets in, retest hardness and iron before you enter them.
- Check the bypass for leaks. A bypass that sat underwater can seep once it's under pressure again. Testing a water softener bypass valve explains how to check it.
- Watch the next two regenerations. Every step should advance on its own, the brine level should drop and then refill, and the drain should stop when the cycle ends.
- Retest hardness at a cold tap after the first full cycle.
The short version: the electronics are almost always finished, the brine tank almost never is, and the resin is judged by a lab report, not by how it looks. When the adjuster asks, and when you decide what to drink, having that lab report is what settles it.
Frequently Asked Questions
Is a water softener ruined if it gets flooded?
Not entirely, but usually in part. If the water reached the control head, the motor, circuit board and transformer should be treated as scrap, because electrical guidance for flood-damaged equipment says submerged controllers and pump controls must be replaced. The brine tank can almost always be emptied, scrubbed and disinfected. The resin in the mineral tank can often be kept, provided it is sanitized and the water passes a bacteria test before anyone drinks it.
Can I just turn my water softener back on after a flood?
No. Put it in bypass and leave it there. Floodwater can reach the resin through the cabinet, back up the drain line if the drain end was under water, or come in through the supply if the well itself flooded. Until the electrical parts have been checked or replaced, the system has been sanitized, and a lab has confirmed the water is free of coliform bacteria, run the house on bypass and use bottled or boiled water for drinking.
Do I need to bypass my water softener when shocking a flooded well?
Yes. CDC guidance on disinfecting wells after an emergency warns that the large amount of chlorine used can damage a water softener and says to follow the manufacturer's instructions and keep the unit bypassed during disinfection. Shock the well with the softener out of the loop, flush the chlorine, then sanitize the softener separately at the dose its own manual specifies.
How do you sanitize a water softener after a flood?
Empty and scrub the brine tank, discard all the salt, and replace any parts that were soaked in floodwater and cannot be cleaned. Then disinfect through the brine well at the dose your manual gives. One manufacturer's manual, for example, specifies 1.2 fluid ounces of 5.25% household bleach per cubic foot of resin, poured into the brine well before a manual regeneration. Follow with a second normal regeneration, refill the salt and wait for a clean bacteria result before drinking the water.
Does flood insurance cover a water softener in the basement?
Under the National Flood Insurance Program's Dwelling Form, the short list of items covered in a basement includes water softeners and the chemicals in them, along with well water tanks and pumps. Coverage still depends on your own policy, and the claim depends on evidence: photographs before cleanup, model and serial numbers, and keeping the damaged unit for the adjuster. NFIP policyholders must send a signed proof of loss within 60 days of the loss.
